 blog
5 Best Roof Tarping Materials for Storm Damage
Table of Contents
- Why Material Matters When Tarping a Roof After Storm Damage
- Polyethylene Tarps: The Most Affordable Option
- Vinyl Tarps: Heavy-Duty Protection for Extended Coverage
- Canvas Tarps: Weather-Resistant Durability
- Best Tarp for Roof Leak Prevention and Material Comparison
- Roof Tarp Thickness and Durability: What You Need to Know
- How to Tarp a Roof After Storm Damage: Installation and Securing Methods
- Roof Tarp Installation and Securing Methods for Long-Term Protection
- Frequently Asked Questions
Last Updated: October 9, 2026
Why Material Matters When Tarping a Roof After Storm Damage
When a storm tears into your roof, you need a temporary fix fast. The roof tarping materials you choose determine how long that fix actually lasts and whether water keeps seeping into your home. Not all tarps are equal, some fail within weeks, others hold for months. The difference comes down to four things: how the material handles UV exposure, whether it resists wind, how thick and durable it is, and whether it stays flexible in changing temperatures.
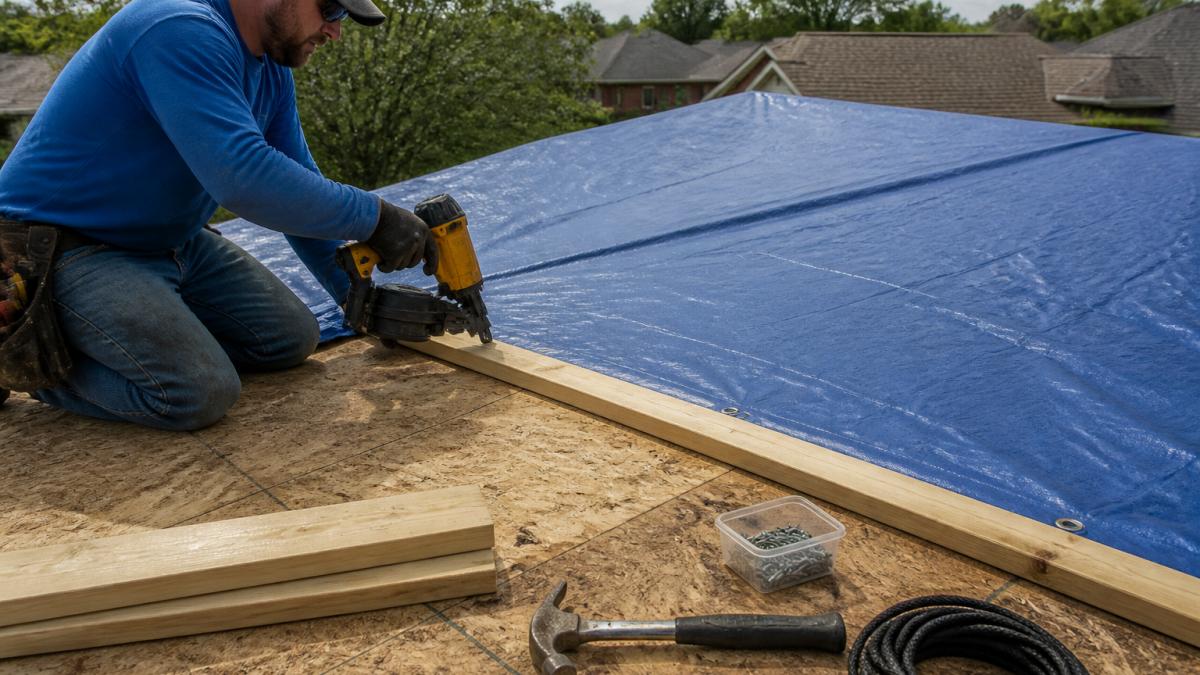
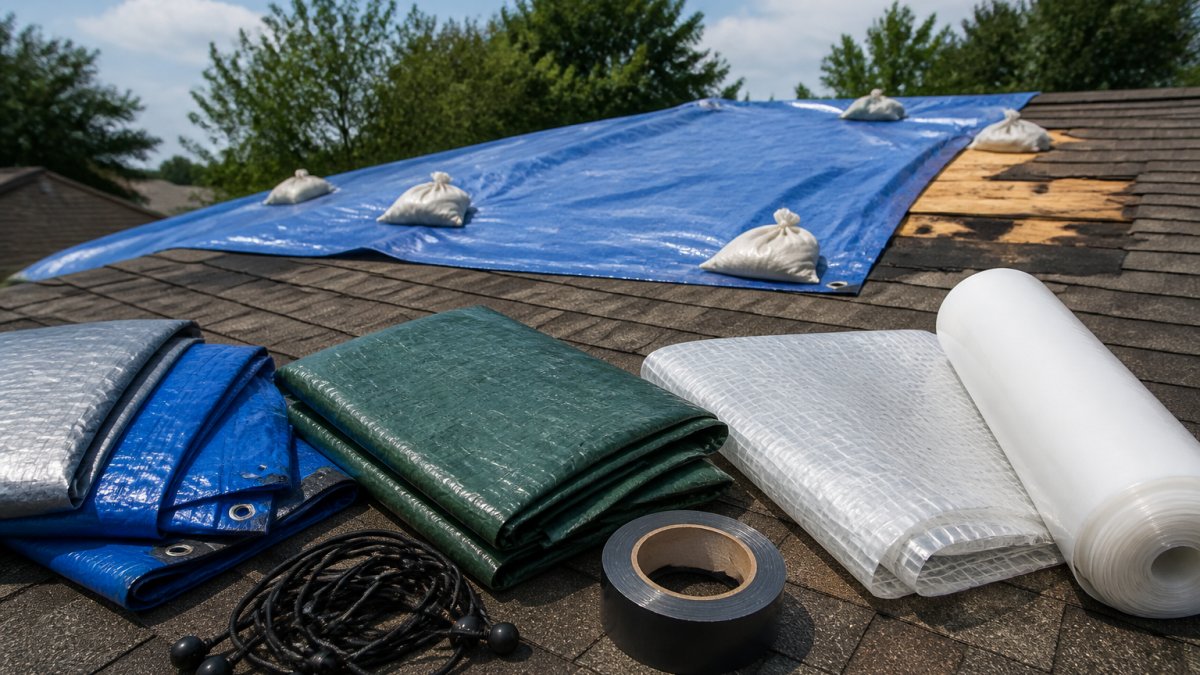
The best roof tarping materials for storm damage each excel in different conditions. Polyethylene works when you need something affordable and quick. Vinyl handles extended exposure better. Canvas offers durability for longer-term situations. Choosing the right one depends on how long you'll need protection, what your roof looks like, and how much wind exposure you're dealing with.
Polyethylene Tarps: The Most Affordable Option
Polyethylene is the entry-level choice for emergency roof protection. It's lightweight, inexpensive, and you can install it quickly without special tools. Most homeowners reach for poly when they need something today and don't want to spend much.
Here's what you get: a thin plastic sheet that sheds water immediately. Polyethylene tarps come in different thicknesses, measured in mils (thousandths of an inch). A 6-mil poly tarp is basic, it works for a few days or a week. A 10-mil version lasts longer and tears less easily.
Polyethylene works best for temporary emergency situations. You're waiting for your insurance adjuster, or your roofer can start work next week. The tarp buys you time. Wind is its weak point, poly flaps and tears in sustained gusts above 20 mph. The grommets, where you attach fasteners, are stress points. Cheap poly grommets pull through the material easily.
Best for: Emergency coverage lasting 1-2 weeks, tight budgets, situations where you expect fast repairs.
Pros:
- Lowest cost of any roof tarp material
- Lightweight and easy to handle
- Installs quickly without tools
- Sheds water immediately
Cons:
- Not UV-stabilized; degrades in sunlight
- Fails within 4-6 weeks of continuous exposure
- Weak in wind over 20 mph
- Grommets tear under stress
- Not suitable for extended coverage
Vinyl Tarps: Heavy-Duty Protection for Extended Coverage
Vinyl is where you move up to serious protection. It's thicker than polyethylene, more flexible, and it resists UV damage far better. A vinyl tarp stays functional for months, not weeks.
Vinyl tarps typically run 10-14 mils thick, which is substantial. The weight makes them harder to handle, you'll need help getting it onto the roof, but that weight also means it doesn't flap in the wind. Vinyl stays put.
The seams matter with vinyl. Look for heat-welded seams rather than stitched seams. Heat-welded seams don't have needle holes where water can seep through. The grommets on quality vinyl tarps are reinforced, usually with brass or steel rings.
Vinyl costs more than poly, but it lasts longer and handles wind better. If your roof damage is significant and repairs will take weeks, vinyl is the practical choice.
Best for: Extended protection lasting 2-3 months, roofs exposed to wind, situations where you need reliable long-term coverage while awaiting repairs.
Pros:
- UV-resistant; lasts 60-90 days
- Thicker and more durable than poly
- Handles wind better due to weight
- Heat-welded seams prevent water intrusion
- Reinforced grommets resist tearing
Cons:
- Higher cost than polyethylene
- Heavier; requires help to install
- Still not permanent; eventual replacement needed
- Can become stiff in cold temperatures
Canvas Tarps: Weather-Resistant Durability
Canvas is the old-school choice, and it's still used because it works. Canvas is woven fabric treated with water-resistant coatings. It breathes slightly, which means some air circulation under the tarp, this can reduce mold risk compared to solid plastic.
Canvas tarps are heavy. They're also more expensive than vinyl. But they last. A quality canvas tarp can provide protection for 4-6 months or longer. The material is flexible, which means it conforms to roof peaks and valleys without cracking.
The downside is maintenance. Canvas can develop mold or mildew if moisture gets trapped underneath. You need good ventilation and edge overlap to prevent water from pooling. Canvas also absorbs water if seams fail, so it requires regular inspection. If the protective coating wears, you need to recoat it.
Canvas works best when you're committed to maintaining it and you need protection that lasts months.
Best for: Long-term protection lasting 4-6 months, roofs with complex shapes, situations where breathability matters, homeowners willing to inspect and maintain.
Pros:
- Naturally durable; lasts 4-6 months
- Breathable; reduces mold risk
- Doesn't crack in cold
- Conforms well to roof shapes
- Classic material with proven track record
Cons:
- Most expensive option
- Heavy; difficult to install
- Requires maintenance and inspection
- Can develop mold if not ventilated
- Protective coating can wear over time
Best Tarp for Roof Leak Prevention and Material Comparison
Choosing the best tarp for roof leak prevention depends on three factors: how long you need coverage, how much wind your location typically sees, and your budget. Here's how they stack up:
| Material | Duration | Wind Resistance | Cost | Best Situation |
|---|---|---|---|---|
| Polyethylene | 1-2 weeks | Poor | Lowest | Emergency coverage, quick fixes |
| Vinyl | 2-3 months | Good | Medium | Extended protection, moderate wind |
| Canvas | 4-6 months | Excellent | Highest | Long-term coverage, high maintenance |
| Mesh | 1-3 months | Excellent | Medium | Allows drainage, prevents pooling |
| Heavy-Duty Reinforced | 3-4 months | Excellent | High | Severe damage, high wind areas |
Leak prevention comes down to overlap and fastening, not just material. Even a basic poly tarp prevents leaks if you overlap edges by 12 inches and secure them properly. Vinyl and canvas do the same job better because they stay in place and don't tear as easily.
The real difference is longevity. If your roofer can start work in a week, poly is fine. If repairs will take a month or longer, vinyl or canvas is worth the investment. Astro Roofing recommends vinyl for most situations, it balances durability, cost, and ease of installation.
Roof Tarp Thickness and Durability: What You Need to Know
Thickness is measured in mils, thousandths of an inch. A 6-mil tarp is thin. A 10-mil tarp is standard. A 14-mil tarp is heavy-duty. Thickness affects durability directly: thicker tarps resist tearing, handle wind better, and last longer.
But thickness alone doesn't tell the whole story. A 10-mil polyethylene tarp is still poly, it degrades in UV. A 10-mil vinyl tarp lasts longer because of the material itself, not just the thickness. The combination of material and thickness matters.
Reinforced edges and grommets extend durability. A tarp with standard grommets tears at those attachment points. A tarp with reinforced grommets or brass rings holds up through multiple wind events. Heat-welded seams don't leak like stitched seams do.
For emergency roof protection, aim for at least 10-mil thickness. For extended coverage, 12-14 mil is better. Thicker tarps also handle foot traffic better, if you or your roofer needs to walk on it, thickness protects against punctures.
How to Tarp a Roof After Storm Damage: Installation and Securing Methods
Installing a roof tarp correctly determines whether it actually protects your home. Improper installation is why tarps fail. Here's how to do it right.
Start by assessing the damage. Is it localized to one area, or does it span multiple roof sections? Localized damage needs a tarp that extends at least 6 feet beyond the damage in all directions.
Measure your roof carefully. Measure from the peak down to the eaves, then across the width. Add 2 feet to each dimension to account for overlap and fastening. A 20×30 foot tarp is common for significant damage on a residential roof.
Secure the tarp with 2×4 boards and cap nails, not rope or bungee cords. Rope and bungee cords don't hold in wind. Here's the process:
- Lay the tarp over the damage, centered and centered on the roof peak
- Pull the tarp tight so it conforms to the roof shape without wrinkles
- Place 2×4 boards along the top edge of the tarp, parallel to the roof peak
- Drive cap nails through the board and tarp into the roof decking at 12-inch intervals
- Repeat for the bottom edge, pulling the tarp tight as you go
- Secure the sides with 1×4 furring strips and cap nails
- Overlap the bottom edge of the tarp over the gutter by at least 12 inches
- Seal any seams with waterproof tape if using multiple tarps
The fastening method matters as much as the tarp itself. Cap nails grip better than regular nails. Space fasteners 12 inches apart along the edges. Loose fastening is the number-one reason tarps fail.
If your roof has a steep pitch, use safety equipment. Don't attempt to tarp a steeply pitched roof yourself if you're not comfortable working at height. This is a job for professionals.
Roof Tarp Installation and Securing Methods for Long-Term Protection
Long-term tarping, anything over a month, requires different thinking than emergency coverage. You're not buying time; you're creating a temporary roof that needs to survive multiple weather events.
Start with a quality material. Vinyl or canvas, minimum 12-mil thickness, with reinforced grommets. The tarp itself is half the battle. Installation is the other half.
For long-term protection, overlap matters more. Overlap the top edge by 18 inches, not 12. Overlap the bottom edge so it extends well past the gutter. Use 2×4 boards, not 1×4 strips.
Inspect the tarp regularly, weekly during the first month, then monthly. Look for tears, loose fasteners, or areas where water is pooling. Water pooling under a tarp leads to rot and mold.
Check fasteners after wind events. Wind loosens nails. Retighten any fasteners that have pulled up. This single step prevents catastrophic failure.
For tarps lasting 3+ months, plan for replacement. Even quality vinyl and canvas degrade eventually. A tarp that's held for 90 days has done its job.
Storm damage demands fast action, and the material you choose for your roof tarp determines whether that action actually protects your home. We handle permanent roof repairs, ensuring your home stays dry and protected.
Frequently Asked Questions
What is the best material for a roof tarp?
The best roof tarping material depends on how long you need protection and your budget. Polyethylene tarps work for short-term emergency coverage (2-4 weeks), while vinyl and canvas tarps provide superior durability for longer-term protection. Vinyl tarps resist UV damage better than polyethylene and last 3-6 months or longer. Canvas tarps offer excellent weather resistance and grip but cost more. For storm damage requiring weeks of protection, vinyl is often the best balance of durability and cost.
What thickness tarp is best for storm damage?
For storm damage, a minimum of 6-mil polyethylene or 8-mil vinyl tarp is recommended. Mil thickness refers to the material's density, higher mil ratings mean greater durability and tear resistance. A 6-mil poly tarp works for temporary emergency coverage, but an 8-10 mil vinyl or reinforced tarp is better for extended exposure to wind, rain, and UV rays. Thicker tarps resist punctures from debris and hold up longer under harsh weather conditions.
How long can a tarp stay on a damaged roof?
A polyethylene tarp typically lasts 2-4 weeks before degrading from UV exposure and weather stress. Vinyl tarps can remain in place for 3-6 months with proper maintenance. Canvas tarps often last 6-12 months depending on weather conditions. However, a tarp is always a temporary solution, it prevents further water intrusion but does not repair the underlying damage. Professional roof repair or replacement should be scheduled as soon as possible after storm damage to avoid long-term structural problems.
Can you tarp a roof yourself after storm damage?
Tarping a roof yourself is possible but carries safety risks, especially after storm damage when footing may be unstable and debris is present. You'll need proper fall protection, secure anchoring materials (2x4 boards, cap nails, or fasteners), and knowledge of roof pitch and weight distribution. Many homeowners choose to hire professionals to avoid injury and ensure the tarp is installed correctly. If you attempt it, never work alone, avoid electrical hazards, and secure all edges tightly to prevent wind damage.